Tuesday, October 18, 2011

Download IDM 6.07 Full Version + Patch FREE


Berikut ini adalah cara lain agar IDM bisa Full Version, yaitu menggunakan file Patch.
Cara ini memang cepat tapi KELEMAHANNYA adalah jika suatu saat IDM men-DETECT bahwa Serial Number hasil dari PATCH, maka bisa Serial Number dari file Patch tersebut TIDAK BISA digunakan lagi.
Jadi DISARANKAN menggunakan cara “Memaksa IDM Versi Berapapun untuk FULL VERSION“, walaupun sedikit rumit tapi bisa untuk selamanya.

Baiklah, berikut cara dengan menggunakan File Patch IDM :
- Buat yang belum punya IDM : Download terbaru 6.07 dahulu disini.
- Untuk yang sudah punya IDM : Uninstall IDM anda dan hilangkan dari REGISTRY.
Cara Hilangkan IDM dari REGISTRY :
- Klik Start - Run
- Ketik : Regedit
- Klik HKEY_LOCAL_MACHINE - SOFWARE
- Cari folder Internet Download Manager kemudian Hapus/Dellete
- Letakkan file “SnDk&p” ini dalam 1 folder HASIL anda meng-INSTALL IDM.
- Sebelum menggunakan file ini “SnDk&p” IDM anda HARUS dimatikan lebih dahulu.
- Jalankan file “SnDk&p”, nanti keluar program. Tekan tombol “Patch Server Check” dan anda akan mendapatkan Serial Number IDM nya.
Patch IDM 6.07
Patch IDM 6.07
- Buka IDM anda yang baru, kemudian pilih menu “Registration” kemudian pilih “Registration”.
- Masukkan Nama dan Email (terserah, bebas) kemudian masukkan Serial Number yang di dapat dari “SnDk&p” tadi.
- Selamat IDM anda sudah Full Version dengan Nama lisensi anda sendiri.

DOWNLOAD IDM 6.07 Full Version + Patch

NetCut 2.1.4

  NetCut - ARP Protocol kernel Tester

Administer your network based on ARP protocol using NetCut, a classic and user friendly software. It can perform multiple tasks like listing IP-MAC table in seconds, turn the network on & off on any LAN computer or device like routers and switchers. Also in the latest version, you can also change the MAC address on any adapter.

With NetCut you can easily manage and track network events and protect users from ARP SPOOF based attacks with only one click! Also you can cut down any computer’s gateway network connection in no time using pure ARP protocol kernel enhanced cut off function keeping it trace free (nobody will be able to trace what happened).

NetCut works great on many type of networks like home LAN, office LAN, school LAN or even ISP LAN.

Easy to use: One click to Protect user Computer Function!!! No one in the network can cut you off with ARP spoof technology anymore .

Effective: one Click to Cut down any computer s network connection to the gateway.
IYFT:Get all IP addresses of the computers in your LAN(Local Area Network) in Secs
High applicability:Work in office LAN,school LAN,or even ISP LAN
Have Fun with play the online computer make them online or off line remotely

Safe: TRACE Free, No one will TRACE out what happen
and last More Stable,swich-hub or hub or cable lan any Lan use Ethernet

Note: The latest version supports Windows 7 both 32 and 64 bit.
NetCut 2.1.4 is licensed as Freeware for the Windows operating system / platform. NetCut is provided as a free download for all software users (Freeware).

Download Now (1.71 Mb)

Kamus Lengkap

Kamus Lengkap

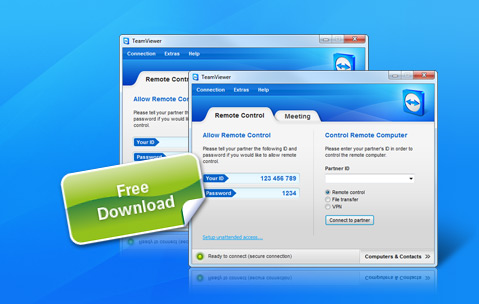
Team Viewer


 TeamViewer is an excellent screen-sharing and file-transfer app that can be used to facilitate business collaborations, remotely access a second computer, or help distraught relatives diagnose and cure computer problems. Along with being free for noncorporate use, it gives users precisely the tools they need to share screens securely, send files with a minimum of hassle, control access rights, and even flip which user has control.
The options available while you're in control work smoothly. You can maximize the pane that the other computer's screen is visible in, as well as utilize several smart options from a drop-down toolbar in the center of the window. A big X lets you close the connection, while the Actions button lets you switch who's in control, disable remote input, and reboot remotely. The View menu hides options to adjust the screen resolution, the optimization toward speed or quality, and control multiple-monitor displays. New features that work just as effortlessly as the old ones include VoIP audio and video conferencing, and integrated teleconferencing. These features push TeamViewer a notch above the rest because they will work without requiring firewall reconfiguration.
When you log in, you're given an access code and a password. Sharing those allows your computer to be controlled by the level you set it to: remote support, presentation, file transfer, or VPN. The TeamViewer servers remember which computers you've connected to, so reconnecting to previously shared computers happens faster. TeamViewer also has a Web-based version, for remote connecting to home from public computer. Even the installation process is impressive. Users can toggle admin rights, can opt out of running at startup, and can opt into installing the TeamViewer VPN driver for more secure screen sharing. TeamViewer makes screen-sharing and file-sharing as fluid and unobtrusive as it should be, and is a must-have for the home or remote office user.
Mediafire Download Link-

Download Now

Sunday, October 16, 2011

Musik


Yuk kita download lagu dan MP3 jadul. Lagu kenangan jadul banyak dicari di internet. Walaupun sekarang lagu modern lagi tenar tapi tetap lagu jadul masih menempati posisi di telinga pendengar lagu jadul. Beberapa artis jadul yang melantunkan lagu jadul ini diantaranya adalah Betharia Sonatha, Black Brothers, Bob Tutupoli, Broery Marantika, Christine Panjaitan, Deddy Dores, Dian Piesesha, Endang S Taurina, Ermy Kulit, Iis Sugianto. Pasti nama-nama artis jadul yang melantunkan lagu lagu jadul tidak asing lagi bagi kita. Yeah siapa sih yang ga kenal dengan mereka. Artis jadul yang top gitu lho… Lagu jadulnya juga hm…. what make we lah….
Yuk download lagu jadul. Nih MP3 lagu lagu jadul ada di hardisk jadul. Yah share yuk… Kl para pembaca ada punya koleksi lagu jadul bagi-bagi lah. Biar lagu lagu jadul itu tetap berjaya tak lekang oleh waktu.


Uhuyy...


Friday, June 10, 2011

HP Deskjet 3900 series driver for Windows 7 and Windows XP

For people who have a HP Deskjet 3900 printer series, perhaps no problems if it is used on the Windows XP, because when the printer released to the market, Windows XP was already released. So this printer is already equipped with a CD driver for Windows XP and earlier Windows versions. However, what if we use it on Windows Vista or 7? Well,until now the manufacturer for this type of HP printer currently does not provide drivers for Windows Vista or Windows 7. They claim that Windows Vista and Windows 7 have the printer driver that already integrated with. But in reality, when we plug the printer into the computer, Windows 7 can not recognize this type of printer. So, how to make it works? Please follow these steps:


First, download the first driver pack in here  or here . 
Archive password to unlock: arisscoot.blogspot.com

Once downloaded, then Extrack file on drive D: or E: (in order to be easy to find).
Then click Windows START button, Select Devices and Printers.

Right click and select " Add a printer " , Select "Add a local printer"

Select the option "Use an Existing port" , choose USB001 (Virtual printer port for USB) then Next.

Select manufacture "HP", see the column on the right, check whether or not the type of printer HP Deskjet 3900, if there is then click Next.but if not available, click " Have Disk ".

Then locate the folder that had already downloaded , select the file "hpf3900a.inf" then Open. follow the instructions as shown below:

Then you just press the Next button until the Finish button appeared.

Well, now the printer is ready to be used. Hope it works and helpful..!!

Sunday, May 1, 2011

How to Install Windows Using USB Drive


Windows is the Operating System software ( Operating System ) which is used by many users as the features that is quite complete and easy to use ( user friendly ). Generally, this software is only available on CD / DVD. Therefore, for computers that does not have a CD / DVD Rom such as Netbook must perform the installation process by using external CD / DVD Rom. It means you must purchase for it?? Oh God.. the price of a CD / DVD-R is not cheap as peanut ..! Well, so we can work around this by installing Windows from USB Flash Drive. Ho do I started? let's see these steps...
First:
Prepare the materials needed, like:
  1. USB Flash Disk with a minimum size of 1 GB for Windows XP, and 4GB for Windows Vista or 7
  2. Bootable CD / DVD Windows (I suggested it is an original Windows CD / DVD)
  3. WinToFlash (please ask to Uncle Google)

Second:
Extrack WinToFlash on the computer, then run. Exe file it (WinToFlash.exe). Select the Windows Transfer Setup Wizard as shown below:

click NEXT. Then it will appear like this:

Windows file path is the drive CD / DVD of Windows that will be transferred to the USB Flash Disk. Specify the location by pressing SELECT. And specify the USB drive you'll use it to store Windows files.

WARNING: Make sure that you have backup all files in the flashdisk, because when the transfer process begins, the flash will be formatted first.

Select NEXT, and if there is confirmation that the Flash Disk will be in the format, select YES. Wait until finished.

Third:
Plug flasdisk contains Windows files to Netbook or Notebook that will be installed. Just do as well as we install Windows by using the CD / DVD. The first thing we should do is setting the BIOS. For its FIRST BOOT switch to USB HDD, because we will use the storage media (flashdisk). Press the F10 key, then restart ... YES ..

For Windows XP:
after the computer restarted the boot options appear (there are 2 options), first select the option "1st, text mode setup (Boot from. ...) and then press ENTER button, it will go to Setup Windows, such as using a CD. Follow the instructions. wait until the copying process is complete and the computer restarts.
After the computer restarts, it will re-appear the menu as before (there are 2 options), but this time select the second option "2nd, GUI mode setup. Continue Setup + first start of Windows" .Furthermore, the installation process will run again, follow the installation instructions and put your serial number of your Windows CD and after the restart, return again First Boot menu in the BIOS,set it to the hard drive. now remove the flash disk, restart and run the computer as usual. 

For Windows 7:
after the restart will go directly to setup the GUI mode (display of images, not the text based like WinXP). Just follow the steps in the setup mode until it is completed.

Good Luck..